How to update your Electron application with Update Rocks!


Today, Electron is widely used to create desktop applications easily and quickly. Developers who have spent many hours coding front-end web applications can now take their knowledge in Javascript and bring their apps to a user’s desktop.
While you only need to re-deploy to ship your modifications in web apps, in desktop applications you need an update routine. Updates are crucial for your user experience. Updates can fix bugs, add features, and even patch an important security breach. That’s why the update experience needs to be really smooth for the user and not something that they will download “later”.
Today, you can either find an auto-update server that will do exactly that or you can code your own. However, these open source projects are not always maintained and you still need to deploy your own server. We believe that developers should only focus on their product and that’s why we created a service that you can use directly without thinking about all of this. While it is framework agnostic we’ve build it so it can perfectly integrate your Electron application. In this article, we will explain how easily you can start using Update Rocks!
Update routine explained
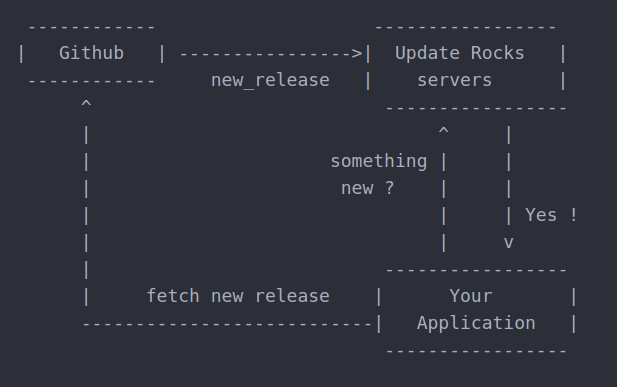
Update Rocks! connects to your Github repositories and fetches the latest release every time Github send a notification. Your application can now query Update Rocks! server to check if something new has been released.
If the application is notified that there is a new release ready for download, it will fetch it directly in Github. We also support private repositories; in this case our server will be a proxy and will redirect the request to Github.
Today we only support Github, but we are actively working on support for Bitbucket and Gitlab.
Let’s Start
Connect with Github
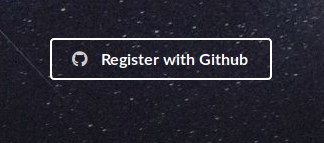
The first step is to connect to Update Rocks! with your github account.
Connect your repository
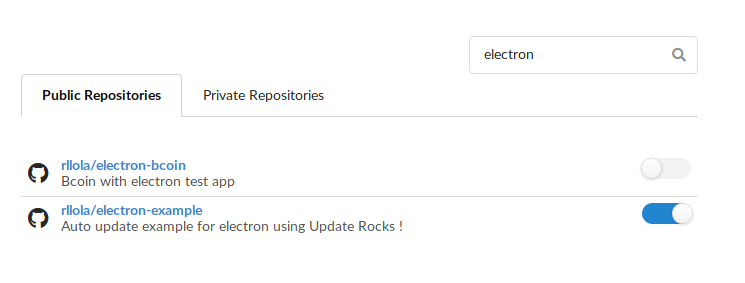
In the Repositories category, find your Electron application and connect it. A message should pop up with a snippet code that you can copy paste in your app.
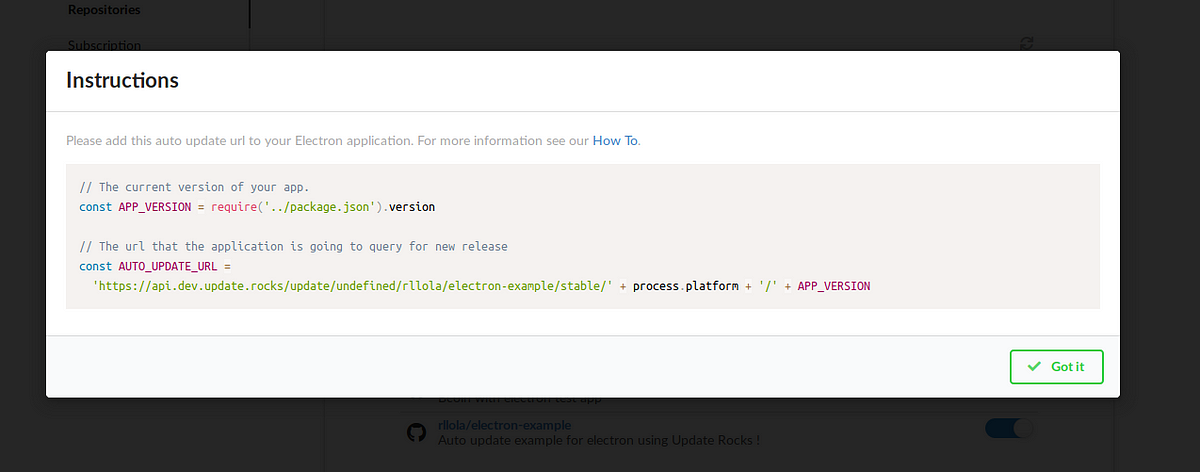
You can find those instructions on the How To page.
Auto update code in your app
Now in your app, you need to add some code to make that will check for update.
updater.js
import electron, {dialog} from 'electron'
const APP_VERSION = require('../package.json').version

const AUTO_UPDATE_URL = 'https://api.update.rocks/update/github.com/<your-username>/<repo-name>/' + process.platform + '/' + APP_VERSION

function init () {
  if (process.platform === 'linux') {
    console.log('Auto updates not available on linux')
  } else {
    initDarwinWin32()
  }
}

function initDarwinWin32 () {
  electron.autoUpdater.on(
    'error',
    (err) => console.log(`Update error: ${err.message}`)

  electron.autoUpdater.on(
    'checking-for-update',
    () => console.log('Checking for update')

  electron.autoUpdater.on(
    'update-available',
    () => console.log('Update available'))

  electron.autoUpdater.on(
    'update-not-available',
    () => console.log('No update available')

  // Ask the user if update is available
  electron.autoUpdater.on(
    'update-downloaded',
    (event, releaseNotes, releaseName) => {
      console.log('Update downloaded')
      dialog.showMessageBox({
        type: 'question',
        buttons: ['Update', 'Cancel'],
        defaultId: 0,
        message: `Version ${releaseName} is available, do you want to install it now?`,
        title: 'Update available'
      }, response => {
        if (response === 0) {
          electron.autoUpdater.quitAndInstall()
        }
      })
    }
  )

  electron.autoUpdater.setFeedURL(AUTO_UPDATE_URL)
  electron.autoUpdater.checkForUpdates()
}

module.exports = {
  init
}
You will need to replace the AUTO_UPDATE_URL line with the one you got in the message when connecting your repository in Update Rocks!
Linux doesn’t have an auto update service like for Windows or MacOS. However you could still call our backend and get the new release detail. However Electron auto-update will not download it for you. You will need to write your own code.
index.js
import { app, BrowserWindow, dialog } from 'electron'
import updater from './updater'
import isDev from 'electron-is-dev'
var log = require('log-to-file')

let mainWindow

const createWindow = () => {

  mainWindow = new BrowserWindow({
    width: 800,
    height: 600,
  })

  mainWindow.loadURL(`file://${__dirname}/index.html`)

  if (isDev) {
    // Open the DevTools. No update call in dev !!!
    mainWindow.webContents.openDevTools()
  } else {
    // Handle squirrel event. Avoid calling for updates when install
    if(require('electron-squirrel-startup')) {
      app.quit()
      process.exit(0)
    }

    if (process.platform === 'win32') {
      var cmd = process.argv[1]
      if (cmd === '--squirrel-firstrun') {
        return
      }
    }

    // Check for updates !!!!!
    mainWindow.webContents.once("did-frame-finish-load", function (event) {
      updater.init()
    })
  }

  mainWindow.on('closed', () => {
    mainWindow = null;
  })
}

app.on('ready', createWindow)

app.on('window-all-closed', () => {
  if (process.platform !== 'darwin') {
    app.quit();
  }
})

app.on('activate', () => {
  if (mainWindow === null) {
    createWindow()
  }
})
This is the minimal code needed for an Electron app with auto-update feature. You will notice that the auto-update code will not be called while in development mode. Also it will not be called when installing on windows as shown in the following lines:
// Handle squirrel event. Avoid calling for updates when install    if(require('electron-squirrel-startup')) {
	app.quit()
	process.exit(0)
}
Or when running for the first time.
if (process.platform === 'win32') {
	var cmd = process.argv[1]
 	if (cmd === '--squirrel-firstrun') {
		return
	}
}
The update verification will be done once the application has been started and the web content is done loading.
// Check for updates !!!!!
mainWindow.webContents.once("did-frame-finish-load", function (event) {
	updater.init()
})
This is all you need!
But now let’s go further and check how to make it work with Travis and Appveyor to automatize the build process.
CI integration
Using CI service is a great plus to your deployment process. Travis and Appveyor can help your create automatically a release for each platform: Linux, MacOS and Windows.
NOTE: We are using electron-forge for this.
.travis.yml
dist: trusty
sudo: required
language: node_js
node_js:
  - "7"
os:
  - osx
  - linux
addons:
  apt:
    packages:
    - rpm
    - fakeroot
before_install:
  # 2016-10: Apple doesn't include openssl any more because of security
  # problems openssl had. Manually specify path to includes/libs.
  - if [ "$TRAVIS_OS_NAME" = osx ]; then brew install openssl; fi
  - if [ "$TRAVIS_OS_NAME" = osx ]; then export CPPFLAGS="-I/usr/local/opt/openssl/include"; fi
  - if [ "$TRAVIS_OS_NAME" = osx ]; then export LDFLAGS="-L/usr/local/opt/openssl/lib"; fi
install:
  - npm install -g electron-forge
  - npm install
script:
  - npm test
deploy:
  provider: script
  skip_cleanup: true
  script: electron-forge publish
  on:
    tags: true
This Travis script will build at the same time for Linux and MacOS. It will automatically upload the assets using electron-forge publish to your github repo (for that don’t forget to add your token https://docs.travis-ci.com/user/deployment/pages/#setting-the-github-token)
appveyor.yml
platform:
  - x64

environment:
  GITHUB_TOKEN:
    secure: E4qaT3siPp/6JLtpXmRRfnQytPM1RZ+9ifyhBnxCHBetp2UYYUHZwKcu+PvQGZkz

init:
  - git config --global core.autocrlf input

install:
  - ps: Install-Product node Current x64
  - npm install npm -g
  - npm install -g electron-forge
  - npm install

deploy_script:
  - IF DEFINED APPVEYOR_REPO_TAG_NAME (npm run publish)

test: off
build: off
This Appveyor script will build your application for Windows 64bit. You will also need to generate a token and encrypt it in appveyor (https://ci.appveyor.com/tools/encrypt).
Both scripts will create a new release when you create a new tag. When you want to deploy an update just create a tag and that’s all!
If you have any questions, feedback, feature requests or want to hire us. Please feel free to contact us : [email protected]