macOS signing for your Electron app with Travis CI


UPDATE: Now you need to notarize your app. You will found the section talking about it at the end of the article.
macOS auto-update requires your Electron app to be signed. In the previous article we created a release using Travis for macOS. In this article, we are going to look at how to automatically sign the release in Travis CI in order to easily distribute your updated application.
Getting your macOS certificate
First you need to get an Apple developer account, which is required for signing: https://developer.apple.com/programs/
Now we are going to look at how to setup up our certificates through the Apple website but we recommend doing this through Xcode.
You then need to select macOS on the top left because we are release a desktop application.
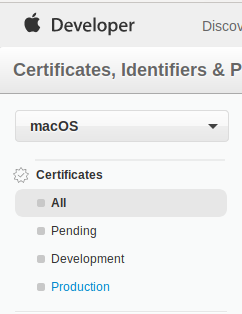
On this page you should see a little '+' which you have to click to create a new certificate.

There are 4 types of certificates available regarding if you want to distribute inside or outside the app store or you need Push Notifications.
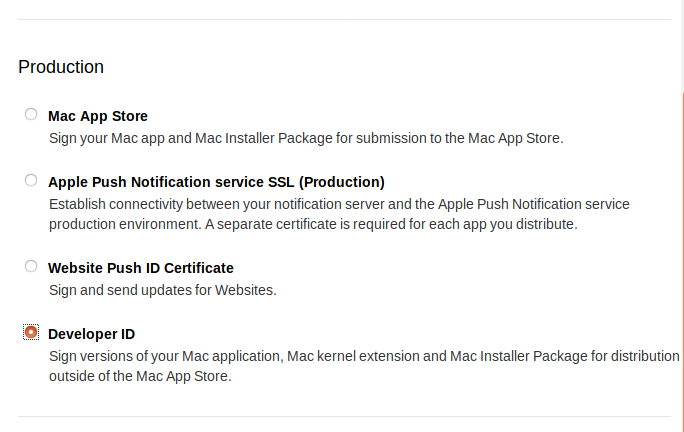
In our case, we are use the Developer ID certificate. It is the one needed for applications outside the App Store.
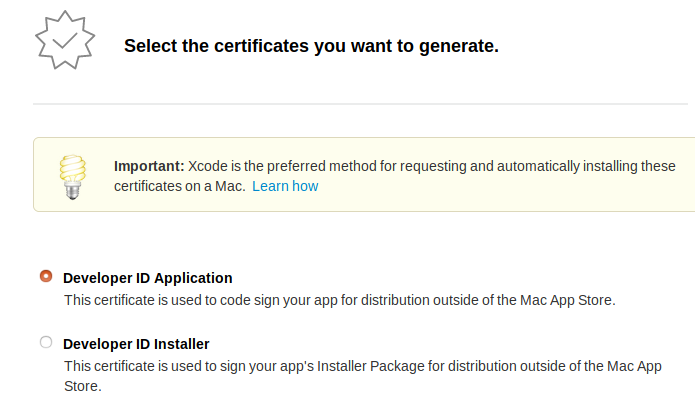
Select “Developer ID Application”.
Follow the instructions in order to download your certificate.
Adding your certificate to Travis CI
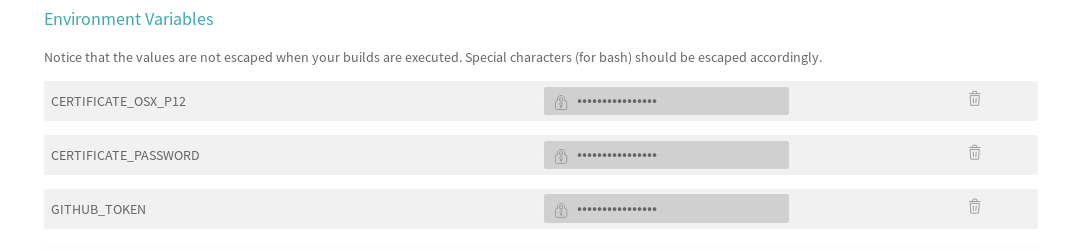
Unfortunately, it is not possible to directly upload a file to Travis using the interface—the easiest way it is to pass the content of the file as a secure environment variable.
First let's get the content of your certificate (the .p12 file) as a base 64 string.
$ base64 -w 0 path/to/your/certificate.p12or copy directly the result to your clipboard with xclip
$ base64 -w 0 developer-id-application.p12 | xclip -i -selection clipboardPast it in your Travis CI settings for your Electron project.

You will also want to add your password to the environment variables if your certificate is password protected. It will then be needed in the script under the environment variable $CERTIFICATE_PASSWORD.
Script
Now let's write our script in order to get our certificate in our keychain.
add-osx-cert.sh
#!/usr/bin/env sh

KEY_CHAIN=build.keychain
CERTIFICATE_P12=certificate.p12

# Recreate the certificate from the secure environment variable
echo $CERTIFICATE_OSX_P12 | base64 --decode > $CERTIFICATE_P12

#create a keychain
security create-keychain -p travis $KEY_CHAIN

# Make the keychain the default so identities are found
security default-keychain -s $KEY_CHAIN

# Unlock the keychain
security unlock-keychain -p travis $KEY_CHAIN

security import $CERTIFICATE_P12 -k $KEY_CHAIN -P $CERTIFICATE_PASSWORD -T /usr/bin/codesign;

security set-key-partition-list -S apple-tool:,apple: -s -k travis $KEY_CHAIN

# remove certs
rm -fr *.p12
And now we have the certificate in our Travis build machines Keychain!
Calling the script in Travis CI
You will now need to call this script as part of your Travis CI instructions. You can just call it before deploying so it won't be called every time you push a new branch.
before_deploy:
  - if [ "$TRAVIS_OS_NAME" = osx ]; then chmod +x add-osx-cert.sh; fi
  - if [ "$TRAVIS_OS_NAME" = osx ]; then ./add-osx-cert.sh; fi
The "$TRAVIS_OS_NAME" = osx will verify if the build is for macOS in case you're building for different OS.
This is all you need to make it work.
You can find a fully working example in our electron-example project: https://github.com/rllola/electron-example
NOTES: Remember that it is the .zip file which should be signed for the update to work.
UPDATE : Notarization in macOS
The notarization of your application using electron-forge is relatively easy. You will need to update your config to add your appleId and appleIdPassword . However you will need to create a forge.config.js like describe in the Windows signing for your Electron app with Appveyor CI article.
Now let's update our config :
  "electronPackagerConfig": {
    "asar": true,
    "osxSign": true,
    "osxNotarize": {
      "appleId": process.env['APPLE_ID'],
      "appleIdPassword": process.env['APPLE_ID_PASSWORD']
    }
  }
Instead of having our Apple ID and password hardcoded we can add it as variable environnment in Travis like we did earlier.
And that's all folks.